The version of Blender I’m using is 2.48a, you can download the software from here , don’t worry it’s free ( as in speech ) software.
When you load Blender the first thing you should do is switch to front view by pressing 1 on the number pad. You might want to remove the cube by right clicking on it in order to select it and press X Key to delete it.
Press Space Key and in the menu select Add, followed by Mesh followed by UVsphere . The default values should be fine, just select OK.
Go to Edit Mode (Tab Key) and use Box Select (B Key) to select the top half of the Sphere. Once selected, press X Key and select Vertices under the list of options. You should end up with half a sphere.
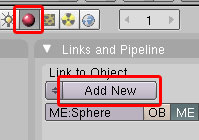
Go to Object settings ( F7 Key ) and select the particle icon.
Create new particle using the Add New button.
Now set alter the particle parameters to match the screenshot.
Quick explanation with what’s going on here:
- Amount determines the number of particles that are to be produced. I’d recommend using less than 10,000 if you’re having performance problems. Sta determines the frame where the particles start to be emitted , in this case we put it at -300 so when we start rendering from frame 0 we will already have many particles in various positions. End determines which frame to stop emitting particles. Life determines the life span of each particle in terms of frames.
- When selected, Random will allow a random number of elements to be emitted.
- This determines the starting speed at a random variation.
- This determines the constant acceleration of each particle along a certain axis, think of AccZ as the direction that either goes up ( positive value ) or down ( negative value ). The larger the deviation of the value from zero the faster the particle speed.
Select the Bake tab from the Particle window.
Select the Bake option. You can specify the end frame for the particle animation with the End value ( this is particularly important to change because once the particle animation reaches this end value it simply stops dead, so make sure it matches the amount of frames to be rendered, if not more ). Once this is finished the Bake button will be replaced by a Free Bake button. You should select this if you want to change any of the particle parameters. Depending on the number of particles and frames of animation, this process could take several minutes.
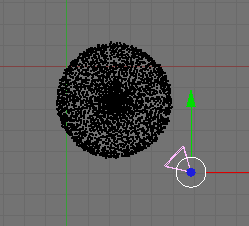
In the end you should be able to see the particle feature taking effect. Go to Object Mode (Tab Key) and play the animation (Alt Key + A Key). It should now look like the following screenshot.
Before you render anything you might want to change the background from the default blue to a black background. You get a better contrast this way. Go to the Shading window (F5 Key) and select World Buttons and change the colour to black.
Our particles now need a snowflake material. Go to Material Buttons and add a new material and copy the following parameters.
You might want to position the camera, to find out how to position and rotate objects check out the Blender tutorial that covers those aspects.
If you’re happy with the setup you can render the result.
The video looks better.
[Vimeo 2299370]
Well that’s it, thanks for taking out the time to go through the tutorial, I hope it was useful. The next tutorial will cover snow fall with more realistic animation. Any questions or comments, feel free to write them in the comments section.


