In the spirit of Christmas I’ve decided to revisit the animated Snow Fall Tutorial that I wrote a while back. The previous tutorial had a number of elements in animating snow that I failed to cover, most important being materials and such. Well this time around I’m covering it and you’ll find that following this years tutorial should produce a similar result to this video:
Not bad. Now lets start the tutorial.
First off download the latest version of Blender 3D from this link. You’re going to need to be somewhat experienced with the tool, in case you have trouble following anything here just leave a comment and I’ll update the tutorial. Otherwise RTFM.
When Blender is loaded, remove the Cube and add a UV Sphere. The default values are fine. Cut the top half of the Sphere off.
When the remaining half of the Sphere is selected, open the Object Editing interface ( F7 ) and then select Particles Button.
Select Add New to create a new Particle effect. To view a simple falling particle effect, keep the default values but modify the Global Effects value for AccZ to a negative value like -0.50, perform the Bake process, play the particle animation ( Alt-A ) and it will fall like rain. Ideally you’d want to take some time out to experiment with these values to achieve a more realistic look. The following screenshot contains a set of parameters I’ve put together myself, feel free to download the higher res version ( click to embiggen ) and copy the values down.
Watch the particle animation after you made the modifications. Assuming you used the values above it should look more randomized and the snow is now falling down a different direction. Now we want the snowfall to change direction during animation. Rather than keyframing Global Effects values, we can simply keyframe Wind instead. Add an Empty to the scene. Doesn’t really matter where you put it, only the direction not position value matters for this effect.
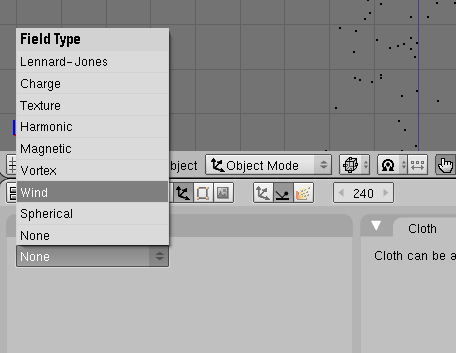
In Object Edit mode, open Physics Buttons and select Fields value to be Wind.
The direction of the wind is influenced by the direction of the Empty’s Z-axis . You can keyframe the rotation of the empty as well as the strength of the effect to get some nice variations in the snow fall animation. I recommend fooling around with the Vortex effect because it’s fun. Once you’re happy with the animation, hit the Render ( F12 ) button to see what result looks like and be amazed by the …
… shoddy result. Don’t fret, we have yet to apply the proper materials. Go into Shading Mode ( F5 ) and copy the values from the following screenshot.
Render the result and you should get something like this:
Now,that’s better. Play around with the values for the particles, physics and materials, hopefully you’ll produce something as good as this ( not my work although I wish it was ):
Good luck.
– Jan


[…] ( Note: This tutorial is outdated, follow the more up-to-date and complete version from this link ) First off credit goes to the author Darek for creating the Blender tutorial that I decided to […]